This is one of those recipes I keep going back to whenever I want something crunchy, a little sweet, and endlessly versatile. I love making a big jar of this granola to sprinkle over yogurt, baked apples, or even to snack on by the handful while I’m working at my desk. It’s got that satisfying crunch thanks to quinoa, and the best part? You can mix in whatever you have in your pantry.
Why I Always Add Quinoa to My Granola
I remember the first time I tried adding quinoa to my usual granola batch—I wasn’t sure how it would turn out. But it was such a pleasant surprise. The little grains toast up beautifully in the oven and add a lovely crispness that store-bought granola often lacks.
Besides the crunch, quinoa brings in a bit of protein and fiber, which I appreciate for breakfast to keep me fuller longer. I usually buy the pre-rinsed kind to avoid that slightly bitter edge. It’s one of those easy little upgrades that makes homemade granola feel extra special without much fuss.
How I Actually Make This at Home
I promise this is as low-maintenance as it gets. I’ve even made it half-asleep on a Saturday morning so we’d have something to munch on all week.
1. Grab Your Pantry Staples
I start with rolled oats and raw quinoa—both are always in my pantry. For oil, I’m partial to coconut oil because I love the subtle tropical aroma it gives. For sweetener, I switch between honey and maple syrup depending on what’s open.
Nuts, seeds, spices… this is where you can get creative. I like to peek in my baking drawer and see what needs using up.
2. Mix It All Together
I use my biggest mixing bowl so there’s no spillage. I toss the oats, quinoa, nuts, seeds, spices, sweetener, and oil together until everything is nicely coated. The smell at this stage is already so inviting—warm cinnamon, toasted nuts, sweet syrup.
3. Spread and Flatten on a Pan
I always line my sheet pan with parchment paper because I don’t want to scrub anything later. Pressing the mixture down helps it bake into those beautiful golden clumps everyone loves. If you skip this, it tends to be loose and dusty.
4. Bake Until Perfectly Toasted
I set a timer for 15 minutes to rotate the pan—my oven has hot spots and I’ve learned the hard way to babysit it a bit. Pulling the darker edges into the center really helps everything brown evenly.
By the time it’s done, the house smells incredible. It’s one of those scents that makes guests ask, “What are you baking?”
Make It Your Own: My Favorite Combinations
Honestly, no two batches of my granola are ever quite the same. That’s the fun of it.
Here’s one of my go-to versions:
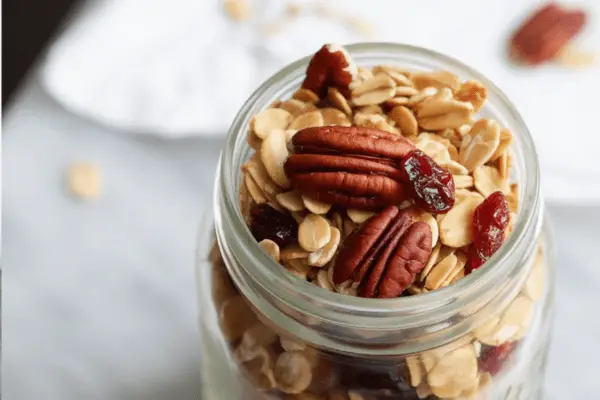
- Nuts: Pecans, almonds, walnuts. I love the mixed textures.
- Seeds: A tablespoon each of chia and ground flax. Adds crunch and a bit of nutrition.
- Spice: Cinnamon is non-negotiable for me. Sometimes I add a pinch of nutmeg.
- Oil: Coconut oil gives it that gentle sweetness. If I’m running low, olive oil works too.
- Sweetener: A half-and-half mix of honey and maple syrup. This blend gives a nice depth of flavor without being cloying.
I often tell people to just use what they love. Have some dried cranberries? Toss them in after baking. Chocolate chips? Why not. It’s your granola.
Homemade Granola Makes Thoughtful Gifts
I started giving jars of this granola as gifts one year when I’d run out of time to bake cookies. People went nuts for it—pun intended. It feels a little more personal and unexpected than the usual holiday treats.
I like to fill mason jars, tie a piece of twine around the lid, and add a handwritten tag. It’s the kind of gift that says, “I made this for you because I thought you’d actually eat it,” which feels so much more meaningful than buying another box of chocolates.
How I Enjoy It Most
I keep a big jar on my kitchen counter so it’s always in reach. Here’s how I like to use it:
- Over thick Greek yogurt with a drizzle of honey.
- Topping for baked apples—I stuff them with granola before baking.
- Sprinkled on smoothie bowls.
- On top of oatmeal for extra texture.
- By the handful straight from the jar on a busy afternoon.
It’s also been a lifesaver on rushed mornings. I’ve grabbed a small container of granola and a yogurt cup on the way out the door more times than I can count.
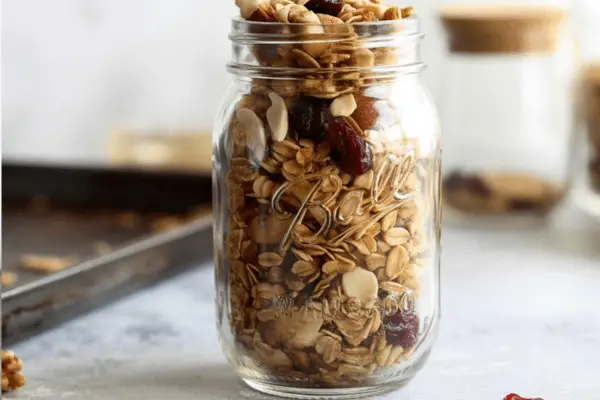
Storing Your Batch
Homemade granola is surprisingly forgiving. I usually store mine in an airtight jar or zip-top bag on the counter. It stays nice and crisp for about a month. Though, to be honest, ours rarely lasts that long.
If you’re making a big batch to gift or meal prep, you can even freeze it. Just let it come back to room temperature before serving.
Extra Little Tips From My Kitchen
- Don’t skip the parchment paper. Cleanup is a breeze, and nothing sticks.
- Press the mixture firmly before baking if you want those big clusters.
- Rotate your pan halfway through for even browning.
- Add dried fruit or chocolate after baking so it doesn’t burn or melt.
- Taste and tweak your sweetener and spices before baking.
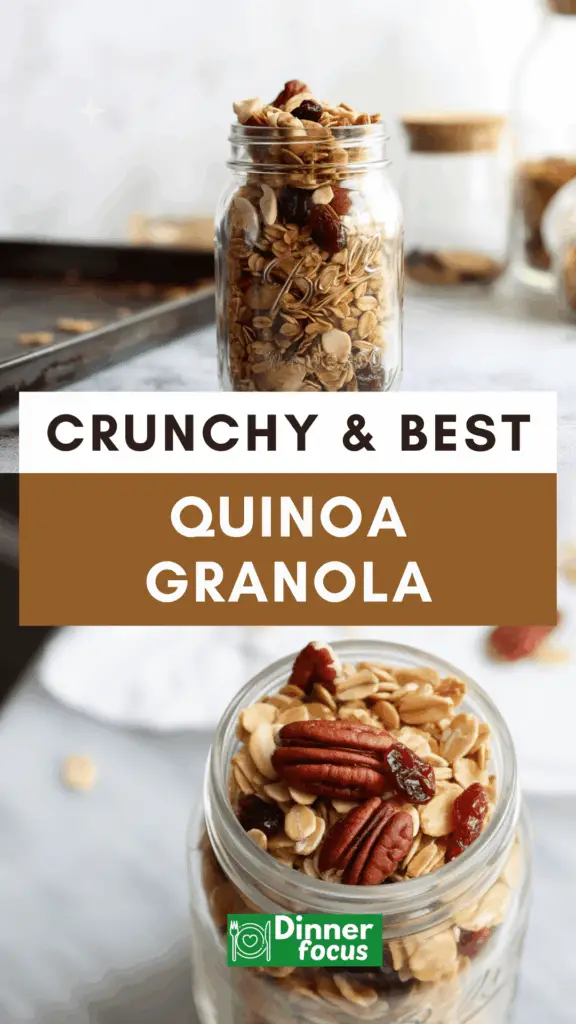
Quinoa Granola
There’s nothing like the smell of freshly baked granola filling your kitchen—nutty, sweet, and just the right amount of crunchy.
Ingredients
- 2 cups rolled oats
- 2 tbsp pre-rinsed or sprouted quinoa (uncooked)
- 1/3 cup maple syrup, honey, or agave—your favorite natural sweetener
- 1/4 cup coconut oil (or any mild oil like olive or canola)
- 1 tsp vanilla extract
- 1 tsp ground cinnamon, nutmeg, or pumpkin pie spice
- 1/4 tsp salt
- 1 heaping cup of your favorite mix-ins: think chopped nuts (pecans, almonds, cashews), coconut flakes, cocoa nibs, puffed rice, or even mini chocolate chips*
- 1/4 cup seeds: try a mix of pumpkin seeds, chia seeds, flax, or hemp
- If using dried fruit, chocolate chips, or dates, stir them in after baking.
Instructions
- Preheat & Prep: Start by preheating your oven to 325°F (163°C). Line a large baking sheet (9x13 inch) with parchment paper to prevent sticking and for easy cleanup.
- Mix the Dry Ingredients: In a large mixing bowl, combine the oats, quinoa, your selected nuts or add-ins, seeds, spices, and salt. Give everything a good stir so it’s evenly distributed.
- Add Wet Ingredients: In a measuring cup, whisk together the oil, sweetener, and vanilla. Pour this mixture over your dry ingredients and stir thoroughly until every bit is coated.
- Spread & Bake: Spread the mixture evenly across your prepared baking sheet. Bake for 25–30 minutes, rotating the pan halfway through. If the edges brown faster, gently mix them into the center to avoid burning.
- Cool Down: Once golden and fragrant, remove the pan from the oven and place on a wire rack to cool. For chunkier granola, let it cool undisturbed. For a looser texture, give it a stir while it's still warm.
- Store & Enjoy: Once fully cooled, transfer to an airtight container or jar. It stays fresh for up to a month (if it lasts that long!).
Nutrition Information
Yield
16Serving Size
1Amount Per Serving Calories 282Total Fat 16gSaturated Fat 8gTrans Fat 0gUnsaturated Fat 8gCholesterol 0mgSodium 79mgCarbohydrates 32gFiber 5gSugar 17gProtein 6g
Dinnerfocus.com, occasionally offers nutritional information for recipes contained on this site. This information is provided as a courtesy and is an estimate only. This information comes from online calculators. Although allchickenrecipes.com attempts to provide accurate nutritional information, these figures are only estimates.
If you try making this, I’d love to know how you customize it. It’s one of those recipes that feels more like a starting point than a rulebook. Have fun with it, and make it yours.
Try other Quinoa recipes:
