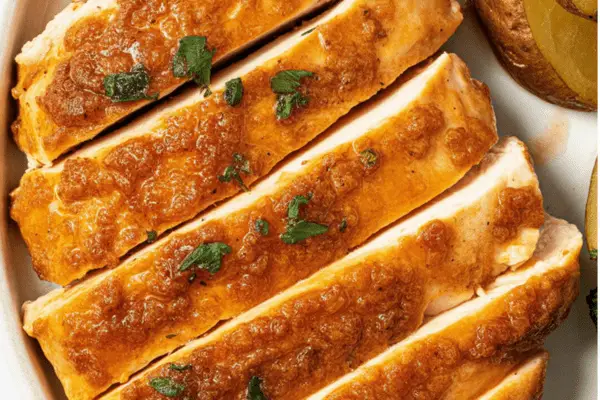
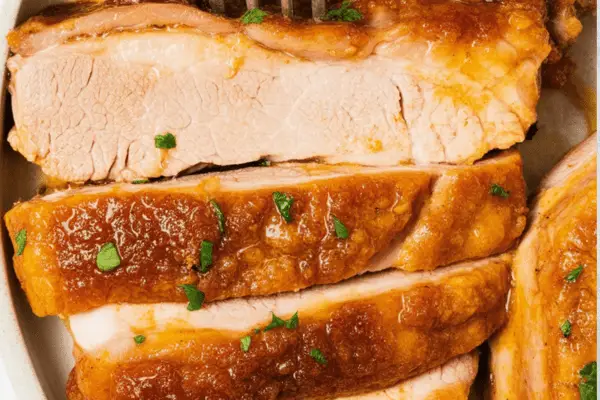
There’s something incredibly satisfying about pulling a tray of perfectly baked pork chops out of the oven. These oven baked boneless pork chops are one of my go-to recipes when I want something simple, hearty, and absolutely delicious. With a quick seasoning rub and a bit of oven magic, they turn out golden, juicy, and packed with flavor every single time.
Now, I’ll admit—I’m a fan of air frying too, especially when I’m in a crunch. But this baked version? It’s every bit as good. The key is a simple, punchy spice rub and using thick-cut chops. Trust me, once you try this method, you’ll come back to it again and again.

Ingredients You’ll Need
Here’s a quick look at what goes into these chops. Simple pantry staples, big flavor.
- Boneless Pork Chops – Go for thick cuts, at least 1 inch thick. Thicker chops stay juicier. If you can’t find them, buy a whole pork loin (around 2 pounds) and cut your own chops.
- Brown Sugar – I use light brown sugar for a subtle sweetness that balances the savory spices. White sugar can work too—just use a bit less.
- Mustard – A mild yellow mustard adds tang and helps the seasoning stick. If mustard isn’t your thing, mayonnaise is a great alternative.
- Olive Oil – Helps the chops stay tender and adds richness.
- Garlic Powder, Onion Powder, Ground Paprika – These are your flavor heroes. They bring warmth, depth, and a hint of smokiness.
- Salt and Black Pepper – For balance and seasoning.
How To Bake Boneless Pork Chops In The Oven
Let’s get right into it—here’s how I make these beauties from start to finish:
1. Lightly Tenderize The Chops
Place your pork chops between two pieces of plastic wrap and give them a few gentle smacks with a rolling pin or meat mallet. You’re not trying to flatten them—just loosen the fibers a bit to help them cook up tender. Four to five taps per chop will do.
2. Coat With Olive Oil And Mustard
Rub each chop with a little olive oil, then follow up with mustard. Don’t forget the edges—every bit should be covered.
3. Mix And Apply The Spice Rub
In a small bowl, mix your brown sugar, garlic powder, onion powder, paprika, salt, and pepper. Sprinkle it generously over both sides of each chop, pressing lightly so it sticks. No need to rub it in—just a good, even coating is perfect.
4. Bake
Place the seasoned chops on a baking tray lined with parchment paper. Bake in a preheated 400°F oven for 6 minutes per ½ inch of thickness—so for 1-inch chops, that’s about 12 minutes. Once they hit an internal temp of 140°F, switch to broil for 1–2 minutes to get a nice caramelized crust.
5. Rest Before Serving
Take the chops out and let them rest for 5 minutes. During this time, the internal temperature should rise to at least 145°F, which is perfect for juicy, safe-to-eat pork.

Recipe Tips
Want to nail this every time? Here are a few things I’ve learned after making this more times than I can count:
- Don’t Skip the Thickness – Thicker chops hold up better in the oven. Thinner ones tend to dry out fast.
- Use a Meat Thermometer – Seriously, it’s a game-changer. You’ll never overcook meat again.
- Season All Sides – The front, back, and even the edges. That’s how every bite gets seasoned.
- Resting Time is Gold – Letting the pork sit after baking helps the juices settle back in, making the meat tender and flavorful.

Internal Temperature Guide
According to the USDA, pork is safe to eat at 145°F (63°C) with a 3-minute rest. That’s your sweet spot—juicy, flavorful, and fully cooked. A quick read with a meat thermometer takes out all the guesswork.
Serving Ideas
These pork chops are versatile, which is why I love them. Here are a few of my favorite ways to serve them:
- Creamy mashed potatoes or buttery Instant Pot mash
- Sautéed green beans or crispy air-fried ones
- Roasted broccoli, asparagus, or even Brussels sprouts
- Potato wedges, oven fries, or baked sweet potatoes
- Or go super simple: a scoop of rice and steamed veggies
- Feeling rustic? Serve with crusty bread, a dab of mustard, and creamy coleslaw
It’s a dinner that feels like you worked hard—but really, the oven did all the work.
Baked Boneless Pork Chops

There’s something incredibly satisfying about pulling a tray of perfectly baked pork chops out of the oven.
Ingredients
- 4 boneless pork chops, at least 1 inch thick
- 1 tablespoon olive oil
- 1 teaspoon yellow mustard
- 1 tablespoon brown sugar
- 1 teaspoon ground paprika
- 1 teaspoon garlic powder
- 1 teaspoon onion powder
- ½ teaspoon salt
- ¼ teaspoon ground black pepper
Instructions
- Begin by heating the oven to 400°F and lining a rimmed baking sheet with either parchment paper or aluminum foil. To tenderize the pork chops, place them between two sheets of plastic wrap and gently tap with a rolling pin or the flat side of a meat mallet. The goal is to soften the meat slightly without making it too thin—just a few light taps should suffice.
- Coat the pork chops with a bit of oil and mustard. In a separate small bowl, mix together brown sugar, paprika, garlic powder, onion powder, salt, and pepper. Evenly rub this spice blend over the surface of each chop.
- Place the prepared pork chops on the baking sheet and cook them on the middle oven rack for 12 to 15 minutes, depending on thickness. As a guideline, allow about 6 minutes of baking time per half-inch of thickness. The internal temperature should reach at least 140°F, though you can go up to 160°F depending on your preference. To add a caramelized finish, switch the oven to broil for 1 to 2 minutes, allowing the tops to brown and ensuring the internal temperature reaches at least 145°F.
- If you're using parchment paper, keep the pork on the middle rack while broiling. Avoid placing them too close to the heat source unless you're using foil or have taken out the parchment. For especially powerful broilers or those located in a separate compartment, it’s best to remove the parchment before broiling.
- Once done, take the pork chops out of the oven and allow them to rest in the pan for about 5 minutes before serving. This short resting period helps the juices redistribute and the temperature to rise slightly—an essential step for juicy, flavorful meat.
Notes
- For best results, use pork chops that are at least one inch thick, with 1¼ inches being even more ideal. If you can only find thin-cut versions, consider purchasing a 2-pound pork loin and cutting it into four thick slices.
- Light brown sugar works best for this recipe, but if you're using white sugar, be sure to reduce the quantity to about half a tablespoon to maintain balance in sweetness.
- A smooth, mild yellow mustard complements the flavors well, though mayonnaise can be a suitable alternative if mustard isn’t to your taste.
- To prevent overcooking, begin checking the internal temperature early during baking. Chops that are just over an inch thick typically take around 14 minutes to cook through.
- When broiling, avoid placing the chops too close to the heat source, especially if using parchment paper. In high-heat broilers, it’s safer to use foil or remove the parchment altogether.
- For food safety, ensure the pork reaches an internal temperature of 145°F, followed by a rest period of three minutes. If you prefer your pork more well-done, aim for an internal temperature of 160°F.
Nutrition Information
Yield
4Serving Size
1Amount Per Serving Calories 361Total Fat 22gSaturated Fat 7gTrans Fat 0gUnsaturated Fat 14gCholesterol 103mgSodium 398mgCarbohydrates 4gFiber 0gSugar 3gProtein 37g
Dinnerfocus.com, occasionally offers nutritional information for recipes contained on this site. This information is provided as a courtesy and is an estimate only. This information comes from online calculators. Although allchickenrecipes.com attempts to provide accurate nutritional information, these figures are only estimates.
How To Store Leftovers
If you’re lucky enough to have leftovers, here’s how to keep them just as tasty:
- Store cooled pork chops in an airtight container in the fridge for up to 3 days.
- Reheat in the oven at 300°F, covered with foil, until warmed through.
- Want to freeze? Wrap each chop tightly in foil or plastic wrap, place in a freezer bag, and freeze for up to 2 months. Thaw overnight in the fridge before reheating.
This recipe is one of those back-pocket basics I rely on when I want a satisfying, no-fuss dinner that everyone will enjoy. It’s not fancy—it’s just really good food done right. Let me know how it turns out in your kitchen!
Try other recipes:
