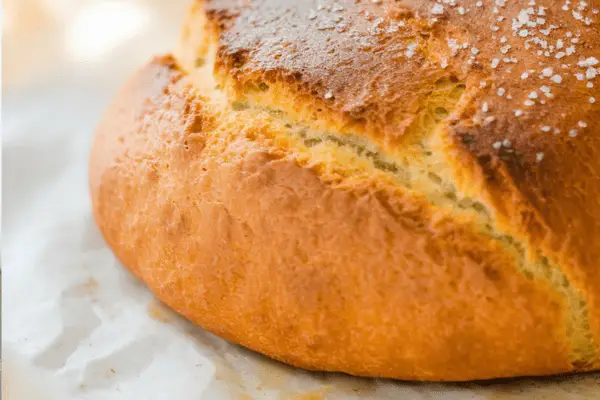
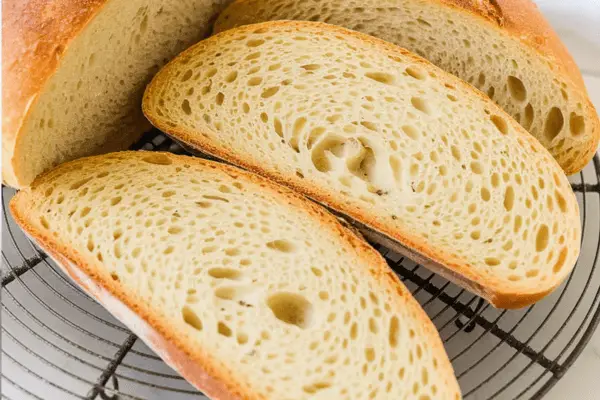
This Instant Pot rustic bread is one of those recipes that will win you over with its simplicity. Just four pantry staples transform into a gorgeous loaf with a crackly crust and a soft, chewy center. I started using my Instant Pot to proof dough on a busy weekday afternoon—and I haven’t looked back since. It gives the dough the gentle, steady warmth it needs without waiting forever.

If you love baking but don’t have hours to spare for multiple rises, you’ll appreciate this trick as much as I do.
Why I Started Proofing Bread in My Instant Pot
I’ll be honest: I didn’t even think about using my Instant Pot for bread until a friend casually mentioned it over coffee. My first reaction was skepticism—I’d always done my no-knead dough the traditional way with a long, overnight rise.
But the promise of fresh bread on the table in a fraction of the time was too tempting to ignore. The first time I proofed dough in the Instant Pot, I was stunned at how evenly and quickly it rose. It had those beautiful bubbles on top and the same chewy interior I loved from my slow-rise recipe.
My family devoured that first loaf with butter, and it’s been a regular in our house ever since.
Ingredients You’ll Need
Let’s talk about what you actually need here: just four basic ingredients (plus one optional for brushing on top).
- Flour – I use all-purpose flour for this, and it works beautifully.
- Yeast – Rapid Rise Yeast is my go-to for this recipe.
- Salt – For flavor, don’t skip it.
- Water – Warm, around 105–110°F.
Optional: Olive oil for brushing the top before baking. I like to finish with a sprinkle of coarse salt for extra crunch.

Yeast Tips for This Bread
If you’re like me and always have multiple little packets of yeast in your fridge, you might wonder which one to grab.
I usually reach for Rapid Rise (instant) yeast here because you can mix it right into the flour. It’s quick and fuss-free.
But if you only have Active Dry Yeast, no worries. I’ve done it plenty of times. Just dissolve it in about 1/4 cup of your warm water first and let it sit for around 10 minutes until it’s nice and bubbly. Then add it to your dry mix with the rest of the water. It works just as well—just takes a tiny bit more patience.
My Steps for Foolproof Instant Pot Bread
Here’s exactly how I make it on a busy afternoon.
- Mix Your Ingredients
Add the flour, yeast, and salt to a large bowl. Pour the warm water over it all and stir. The dough will look shaggy and a bit dry—that’s normal. There’s no kneading here, which is part of the appeal. - Get Your Instant Pot Ready
Spray the inside with oil or cooking spray. This prevents sticking and makes cleanup easier. - Proof in the Instant Pot
Place your dough in the liner. Secure the lid (but keep the valve set to venting). Use the Yogurt setting for 4 hours. This setting keeps a steady, gentle warmth that helps the yeast thrive. By the end, your dough should have doubled in size and have those lovely bubbles on top. I love checking on it—it feels like magic every time.
Why the Yogurt Setting Works So Well
I get this question a lot. The Yogurt function on an Instant Pot creates a warm, humid environment—exactly what yeast dough craves. It’s like giving your dough its own little spa treatment.
In my drafty old kitchen, rising bread on the counter can be unpredictable, especially in winter. This setting gives me consistent, reliable results no matter what the weather’s doing outside.

Baking Your Perfect Loaf
This part is just as important. Here’s what I do:
- Remove the dough from the Instant Pot onto a floured surface. Shape it into a loose ball or oval—don’t stress about making it perfect.
- Cover it with a towel while the oven preheats to 450°F.
- Heat your Dutch oven (with lid) in the oven as it preheats. This ensures you get that classic crusty exterior.
- Optional but highly recommended: Brush the top of your shaped dough with olive oil and sprinkle with coarse salt. That salty crunch is so satisfying.
- Carefully (it’s hot!) place a piece of parchment paper in your preheated Dutch oven. Gently transfer the dough in.
- Bake covered for 30 minutes, then remove the lid and bake another 15 minutes or until golden brown and beautiful.
My Favorite Ways to Enjoy It
When that loaf comes out, the temptation is to cut it right away, but give it a little time to cool. It slices so much better.
I love this bread with:
- A thick swipe of salted butter
- Your favorite jam (homemade strawberry is a favorite in our house)
- Served alongside soup on a chilly evening
- Toasted for breakfast with a fried egg on top
Storage Tips I Use
This bread doesn’t last long in our kitchen, but when it does:
- Store it at room temperature wrapped in a clean kitchen towel or paper bag for a day or two.
- For longer storage, I’ll often slice it and freeze it. It toasts beautifully straight from frozen.
Questions I Get About This Bread
Can I use whole wheat flour?
You can swap part of the all-purpose flour for whole wheat, but I recommend keeping at least half all-purpose so it doesn’t get too dense.
Do I have to use a Dutch oven?
A heavy oven-safe pot with a lid works best for that crust. But you can bake it on a baking sheet—it just won’t get quite the same crunch.
What if I don’t have an Instant Pot?
You can do the rise the old-fashioned way at room temperature—it’ll take 12–18 hours instead of 4.
Instant Pot Bread

Craving the warm, crusty goodness of homemade bread but short on time? This simple, rustic loaf comes together beautifully with the help of your Instant Pot—no kneading, no stress.
Ingredients
- 1 ½ cups warm water (between 105–110°F)
- 3 cups all-purpose flour
- 1 ¼ teaspoons salt
- ½ teaspoon rapid-rise (instant) yeast
- Olive oil, for brushing
- Coarse salt, for sprinkling
Instructions
- In a large mixing bowl, combine the flour, salt, and yeast. Give it a quick stir to distribute everything evenly.
- Slowly pour in the warm water and mix until the dough forms. It will be a rough, shaggy mixture—don’t worry, that’s exactly what you want.
- Lightly grease the inner pot of your Instant Pot. Transfer the dough into it.
- Close the lid, set the valve to “venting,” and select the Yogurt setting. Let the dough rise for about 4 hours, until it’s doubled in size and you see small bubbles across the top.
- Once risen, turn the dough out onto a floured surface. Gently shape it into a round loaf.
- Cover with a kitchen towel and allow it to rest while your oven preheats to 450°F. Place your Dutch oven (with the lid on) inside to preheat as well.
- After resting, lightly brush the top of the dough with olive oil and sprinkle with coarse salt.
- Carefully remove the hot Dutch oven, line it with parchment paper, and place the dough inside. Cover with the lid and bake for 30 minutes.
- After 30 minutes, remove the lid and continue baking for another 15 minutes, or until the crust is deeply golden.
- Lift the bread out of the pot and let it cool on a wire rack before slicing.
Notes
- No Yogurt setting? Use the Keep Warm function for a couple of minutes to warm the pot, then turn it off. Add the dough and let it rise with the residual heat.
- No Dutch oven? Any heavy, oven-safe pot with a lid will work just fine.
Nutrition Information
Yield
8Serving Size
1Amount Per Serving Calories 186Total Fat 2gSaturated Fat 0gTrans Fat 0gUnsaturated Fat 2gCholesterol 0mgSodium 406mgCarbohydrates 36gFiber 1gSugar 0gProtein 5g
Dinnerfocus.com, occasionally offers nutritional information for recipes contained on this site. This information is provided as a courtesy and is an estimate only. This information comes from online calculators. Although allchickenrecipes.com attempts to provide accurate nutritional information, these figures are only estimates.
Final Thoughts from My Kitchen
This Instant Pot bread is the kind of recipe I love sharing. It feels a little old-fashioned in spirit, even though it’s using a modern appliance. It’s comforting, smells incredible as it bakes, and brings people to the table.
If you’ve never tried proofing dough in your Instant Pot, give it a shot. You might find yourself baking bread more often than you thought you would.
Try other Instant Pot recipes:
