If you’ve ever stood in your kitchen eyeing that bag of dried beans and thought “Ugh, I forgot to soak these overnight”, I get it. I used to avoid cooking dried beans for that very reason. But my trusty Instant Pot changed the game completely for me.

Now, I can go from rock-hard beans to tender, flavorful ones in about an hour, with zero overnight planning. It’s honestly one of the best reasons to own an electric pressure cooker.
I make beans almost every week—they’re cheap, nutritious, and so versatile. From adding them to hearty stews to throwing them in quick wraps or salads, they’re always in rotation in my kitchen.
Why I Love Cooking Beans This Way
Cooking dried beans in the pressure cooker has become a real time-saver in my house. For years, I relied on canned beans (no shame in that), but the texture never really wowed me.
When I finally tried making dried beans without soaking them first, I was blown away. The pressure cooker gives you soft, creamy beans that hold their shape beautifully. They taste better than canned, and they’re cheaper too.
Plus, there’s something satisfying about cooking them yourself. I like knowing exactly what’s in them—no mystery additives or too much salt.
My Go-To Method for Cooking Beans
Here’s how I usually do it on a busy weeknight when I want beans for tacos, curries, or even just to have on hand for quick meals:
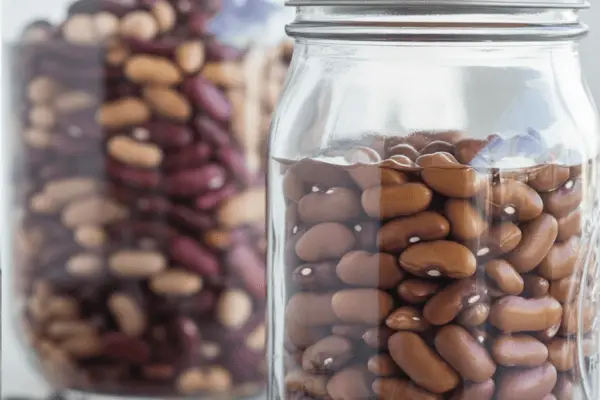
- Sort and rinse: Always give the beans a good rinse and check for any tiny stones. I’ve found a pebble once. Not fun.
- Water ratio: I add about 8 cups of water for every pound (or 2 cups) of dried beans.
- Cooking: Set the Instant Pot to high pressure for the right time (see my guide below).
- Natural release: Let the pressure come down naturally for at least 20 minutes. It keeps the beans from splitting too much.
- Finishing touch: I stir in salt after cooking and usually add a splash of apple cider vinegar. That little bit of acidity helps with digestion and perks up the flavor.
Another small thing—I like storing my cooked beans with a bit of the cooking liquid. It keeps them tender in the fridge.
How Long to Cook Different Beans
Here’s the cheat sheet I keep stuck to my fridge:
- Black beans – 30 minutes
- Chickpeas – 40 minutes
- Kidney beans – 35 minutes
- Pinto beans – 25 minutes
- Navy beans – 25 minutes
- Great Northern beans – 35 minutes
If I want them extra soft for things like refried beans, I just add 10 more minutes.
Adding Flavor to Your Beans
You can just cook them in water, but I almost always toss in a halved onion and a bay leaf. Sometimes I add a couple of garlic cloves too. It’s such an easy way to make the beans more interesting without any work.
One thing I learned the hard way—don’t salt them before pressure cooking. It can toughen the skins. I season them once they’re cooked.
If I’m making a batch for tacos or chili, I sometimes stir in a spoonful of homemade taco seasoning at the end. It makes them ready to use on the spot.
How Much Should You Cook?
This is a question I get from friends a lot.
- 1 pound of dried beans = about 2 cups.
- After cooking, those 2 cups become roughly 6 cups of cooked beans.
- Most store-bought cans are about 15 ounces, or 2 cups cooked.
So one batch in the Instant Pot gives you the same as 3 cans. I usually make a full pound and freeze half if I don’t need them all that week.
Storing Leftover Beans
If you’re going to go to the trouble of cooking beans, make extra. I always do.
- Fridge: Store in a sealed container with a bit of cooking liquid for up to 5 days. They stay moist and tender that way.
- Freezer: Portion them into 1- or 2-cup amounts in freezer bags or containers. Add a bit of cooking liquid before freezing. They’ll keep well for about 3 months.
I love pulling a bag of frozen beans out when I’m short on time. They thaw quickly and are ready to add to soups, rice dishes, or wraps.
My Personal Cooking Tips
Here are a few things I’ve learned after countless batches of beans in the Instant Pot:
- For softer beans: Add about 10 extra minutes to the pressure cook time.
- If you pre-soak: Reduce the time by about 10 minutes. Sometimes I’ll soak if I think ahead, but usually I don’t bother.
- Don’t overfill: Beans expand a lot. I never fill the Instant Pot more than halfway when cooking them.
- Natural release is best: It helps the beans keep their shape and prevents foamy spills. If you need to quick-release after 10–20 minutes, do it carefully with oven mitts.
- For easier digestion: Add that splash of apple cider vinegar at the end. My family really appreciates this tip.
Instant Pot Dried Beans
There’s nothing quite like the simplicity of cooking a big batch of beans from scratch—especially when your Instant Pot does most of the heavy lifting.
Ingredients
- 2 teaspoons kosher salt
- ½ teaspoon apple cider vinegar (optional, for brightness)
- 1 pound dried beans of your choice (about 2 cups), rinsed and sorted
- 8 cups water
- 1 bay leaf (optional, for subtle flavor)
- 1 medium onion, sliced (optional, adds depth)
Instructions
- Prep the Pot: Add the rinsed beans to the inner pot of your Instant Pot. Pour in the water, then add the sliced onion and bay leaf if using.
- Seal & Cook: Secure the lid and ensure the pressure valve is set to “Sealing.” Select High Pressure and adjust the cook time according to the type of bean you're using: Black Beans: 30 minutes, Chickpeas: 40 minutes ,Kidney Beans: 35 minutes, Pinto Beans: 25 minutes, Navy Beans: 25 minutes, Butter Beans: 40 minutes, Great Northern Beans: 35 minutes, Cannellini Beans: 35 minutes, Large Lima Beans: 22 minutes, Baby Lima Beans: 18 minutes
- Natural Release: Let the pressure naturally release for at least 20 minutes before venting any remaining pressure manually. This ensures the beans continue to cook gently and prevents splattering.
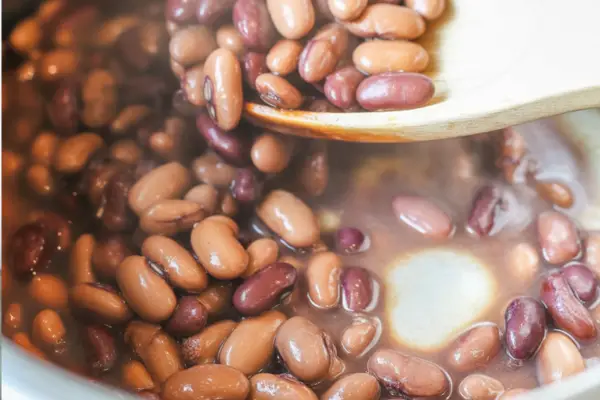
- Season & Store: Once the pressure has released and the lid is removed, stir in the salt and apple cider vinegar, if using. For best texture, store the beans in some of their cooking liquid. They’ll stay moist and ready to use for days.
Notes
- Older beans can take longer to cook and may never fully soften, so check the packaging date if possible.
- Want extra tender beans? Add an additional 10 minutes to the cook time.
- Using pre-soaked beans? Cut the cooking time by 10 minutes and reduce water to 5 cups.
- Making a larger batch? For every extra pound of beans, increase water by 2 cups.
- For navy beans that hold their shape (like in baked beans), soak them overnight and cook for just 15 minutes under pressure with a natural release.
Nutrition Information
Yield
24Serving Size
1Amount Per Serving Calories 20Total Fat 0gSaturated Fat 0gTrans Fat 0gUnsaturated Fat 0gCholesterol 0mgSodium 173mgCarbohydrates 4gFiber 1gSugar 2gProtein 1g
Dinnerfocus.com, occasionally offers nutritional information for recipes contained on this site. This information is provided as a courtesy and is an estimate only. This information comes from online calculators. Although allchickenrecipes.com attempts to provide accurate nutritional information, these figures are only estimates.
Cooking beans this way is one of those simple habits that’s saved me so much money and made weeknight dinners less stressful. If you haven’t tried pressure-cooking your own dried beans, give it a shot. You might find you never buy canned again.
Try other Instant Pot recipes:
